This is a draft version of the post. It’ll be revised.
Installing Ubuntu Server
- Download the latest version of Ubuntu Server. Note that it is not possible to convert Ubuntu 32 bit to 64 bit. The only way is to do a clean install.
- Create a bootable USB stick using Pen Drive Linux’s USB Installer.
- Boot up from USB and install Ubuntu Server. During the installation you can switch to terminal mode by pressing Alt+F2 and switch back by pressing Alt+F1.
Update the server:
aptitude update
aptitude safe-upgrade
Install SSH with tasksel, FTP and sendmail with apt-get. To configure FTP and sendmail see Installing and configuring FTP server on Ubuntu and How I configured sendmail for PHP on Ubuntu Server 12.04.
Append the following to /etc/bash.bashrc:
PATH=$PATH:/usr/local/shared_sh

# enable color support of ls and also add handy aliases
if [ -x /usr/bin/dircolors ]; then
    test -r ~/.dircolors && eval "$(dircolors -b ~/.dircolors)" || eval "$(dircolors -b)"
    alias ls='ls --color=auto'
    #alias dir='dir --color=auto'
    #alias vdir='vdir --color=auto'

    alias grep='grep --color=auto'
    alias fgrep='fgrep --color=auto'
    alias egrep='egrep --color=auto'
fi

# some more ls aliases
alias ll='ls -alF'
alias la='ls -A'
alias l='ls -CF'
Installing LEMP
Installing MySQL
Install MySQL server by running
apt-get install mysql-server mysql-client
During the installation you will be prompted to provide a password for the MySQL root user.
To ensure that MySQL works login from the command line:
mysql -u root -p<root password>
Installing Nginx
Install and start Nginx as follows:
apt-get install nginx
/etc/init.d/nginx start
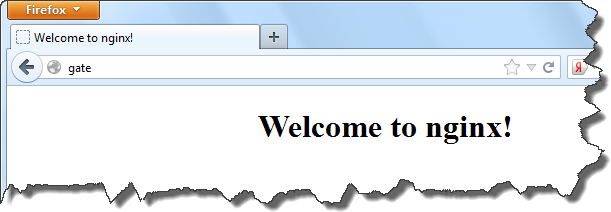
To ensure that Nginx works type in your web server’s IP address or hostname into a browser and you should see the following page:
Installing PHP5
Install PHP5 with the following command
apt-get install php5-fpm php5-cli
then check witch PHP5 modules are installed by default:
php -m
and install missing modules:
apt-get install php5-mysql php5-gd php5-curl php-apc
Configure each module by editing /etc/php5/conf.d/*.conf files. To increase the size of shared memory segment used by APC module from its default value “32M” to “128M” append line
apc.shm_size="128M"
to /etc/php5/conf.d/apc.ini.
Configuring user permissions
Create user ‘devnote’
useradd -d /home/devnote -m devnote
Add user ‘www-data’ to group ‘devnote’ (Nginx reads static files (*.jpg, *.png, etc) as www-data and PHP-FPM reads and executes PHP scripts as devnote ).
usermod -a -G devnote www-data
Restart Nginx
/etc/init.d/nginx restart


with PHP 7.0 I also installed the following:
apt-get install php7.0-xml
apt-get install php7.0-mcrypt
apt-get install php7.0-zip
To fix some error with languages I did:
locale
locale-gen “en_US.UTF-8”
dpkg-reconfigure locales
Allowing remote MySQL access:
sudo nano mysqld.cnf
#bind-address = 0.0.0.0
sudo service mysql restart
Added this to my /etc/nginx/nginx.conf:
gzip_min_length 1000;
gzip_vary on;
gzip_proxied any;
gzip_comp_level 6;
gzip_buffers 16 8k;
gzip_http_version 1.1;
gzip_types text/plain text/css application/json application/javascript text/xml application/xml application/xml+rss text/javascript;
I am not sure about all the gzip_* directives, but at least gzip_types need to be defined, because its default value is text/html.
see https://stackoverflow.com/questions/70220088/nginx-does-not-compress-web-pages
Online tool that checks if the pages are compressed: https://tools.pingdom.com/