
where memory and swap are required to prevent
cmake build . --parallel
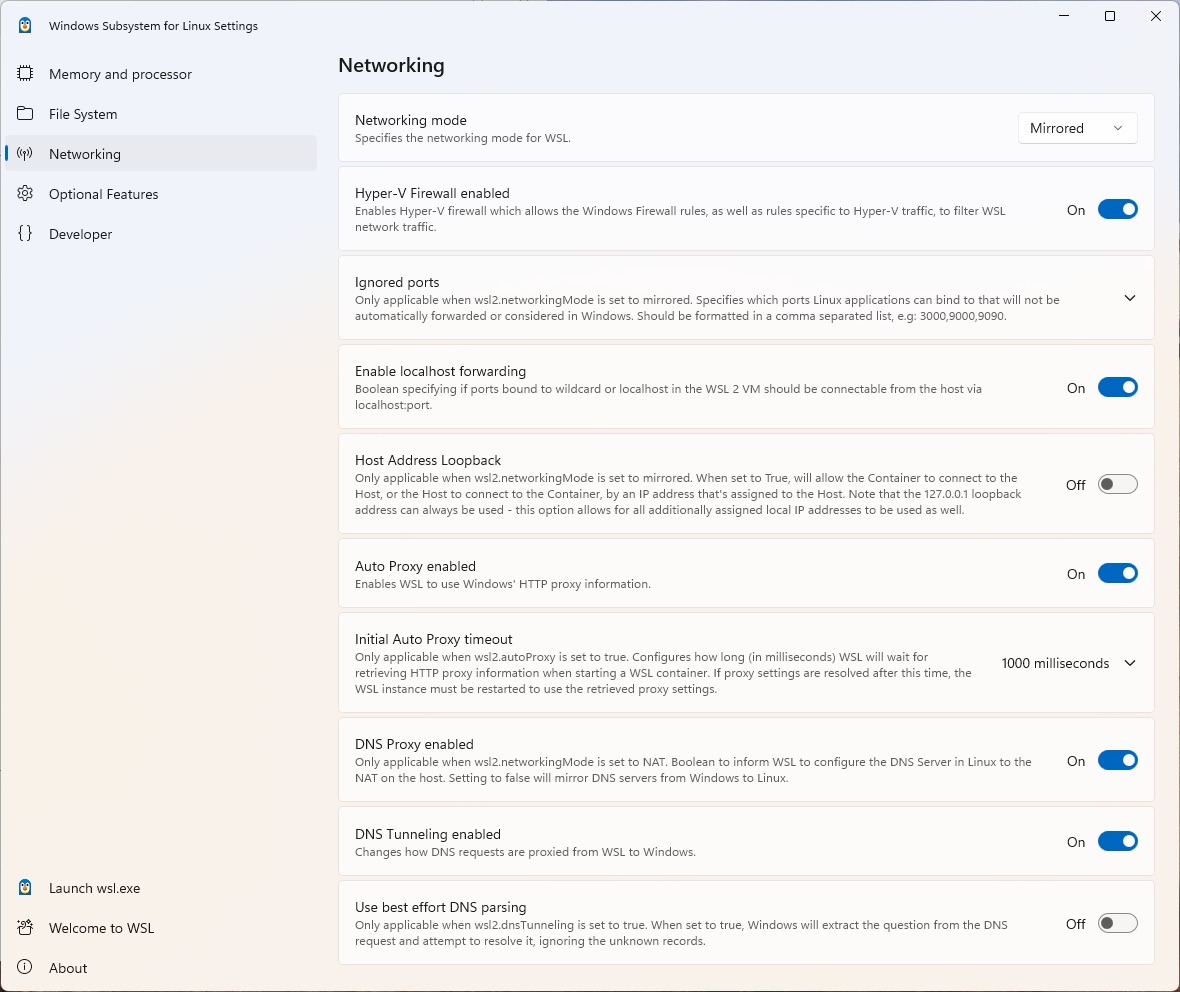
command from being terminated, and the rest of the configuration file is required to use host’s VPN.
After WSL is restarted in PowerShell with
wsl --shutdown
the following command
curl -s https://api.ipify.org
in WSL should show IP address obtained through VPN.
Alternatively they use UI, see the screenshot.
Setting up Linux build environment
sudo apt-get update
sudo apt-get install cmake gcc clang gdb build-essential
Installing CLion
After that they download CLion-2025.2.win.zip, extract it to C:\dev\tools\CLion-2025.2.win and run:

IDE starts to download and install:


.idea/ folder appears in ~/dev/repos/hello directory, so I do not know what is hello, probably we do not longer need it.
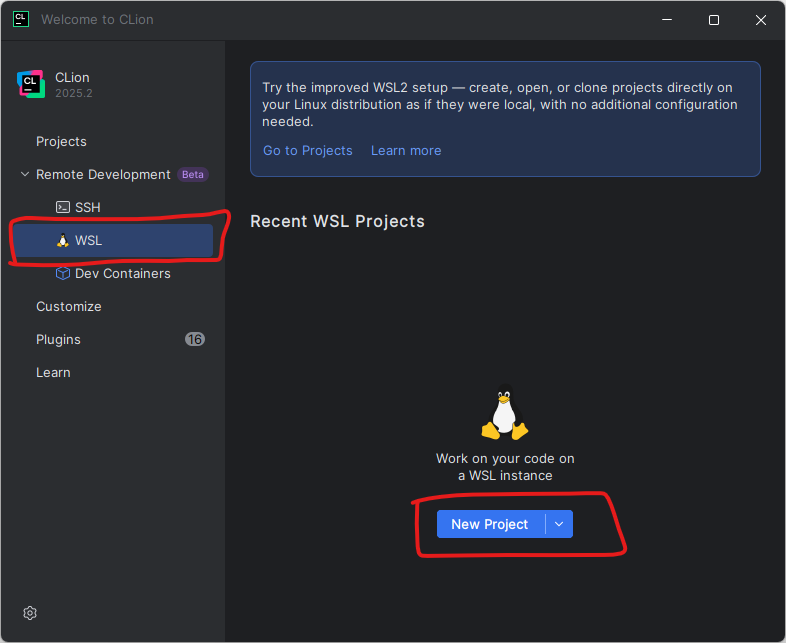
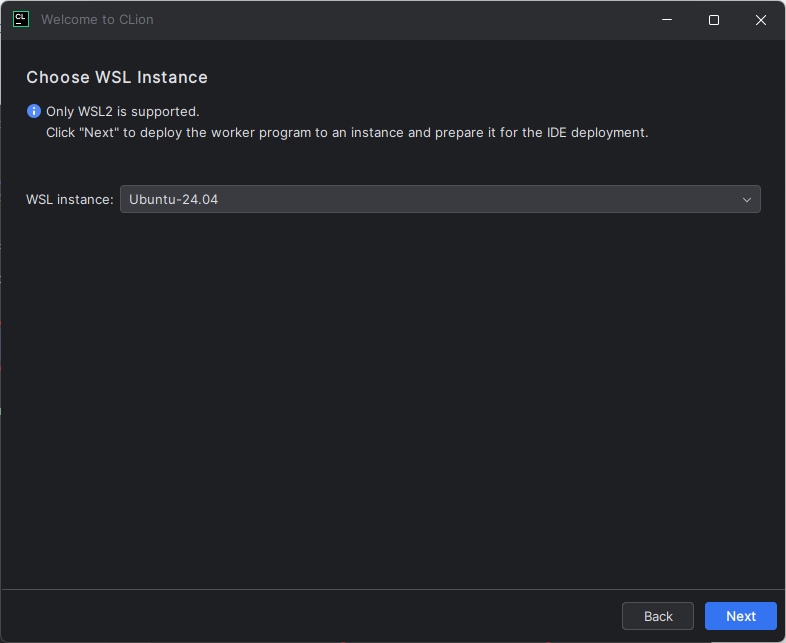
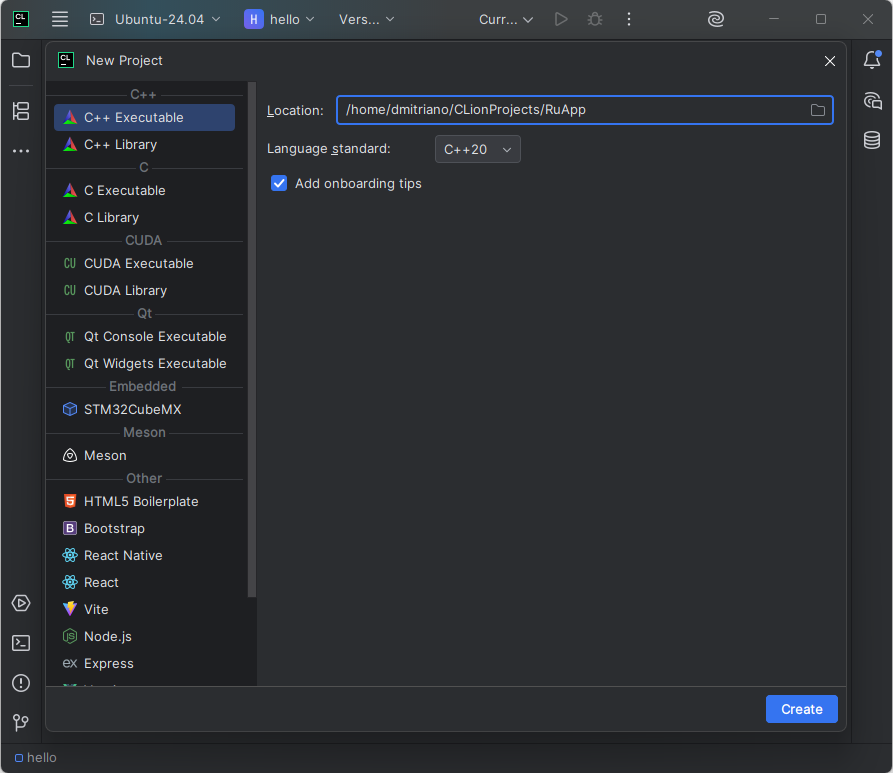
After that Russians create a project:
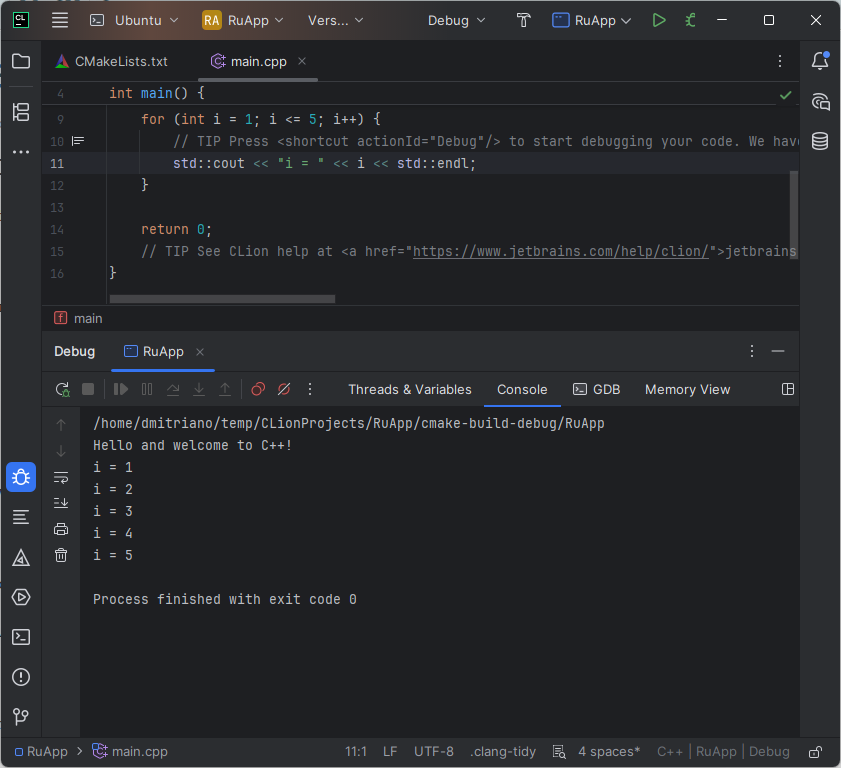
set a breakpoint, start a debug session and enjoy how it successfully triggers:
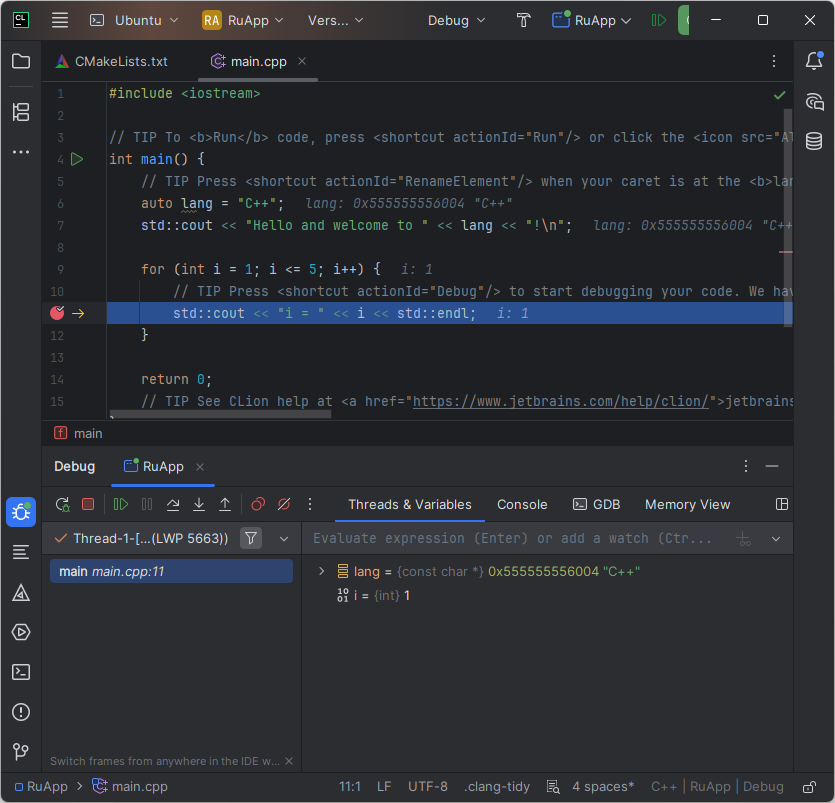
CLion shows the application output in its console window:
Newly created app folder contains these files:
.idea
cmake-build-debug
CMakeLists.txt
main.cpp
CMakeLists.txt:
cmake_minimum_required(VERSION 4.0)
project(RuApp)

set(CMAKE_CXX_STANDARD 20)

add_executable(RuApp main.cpp)
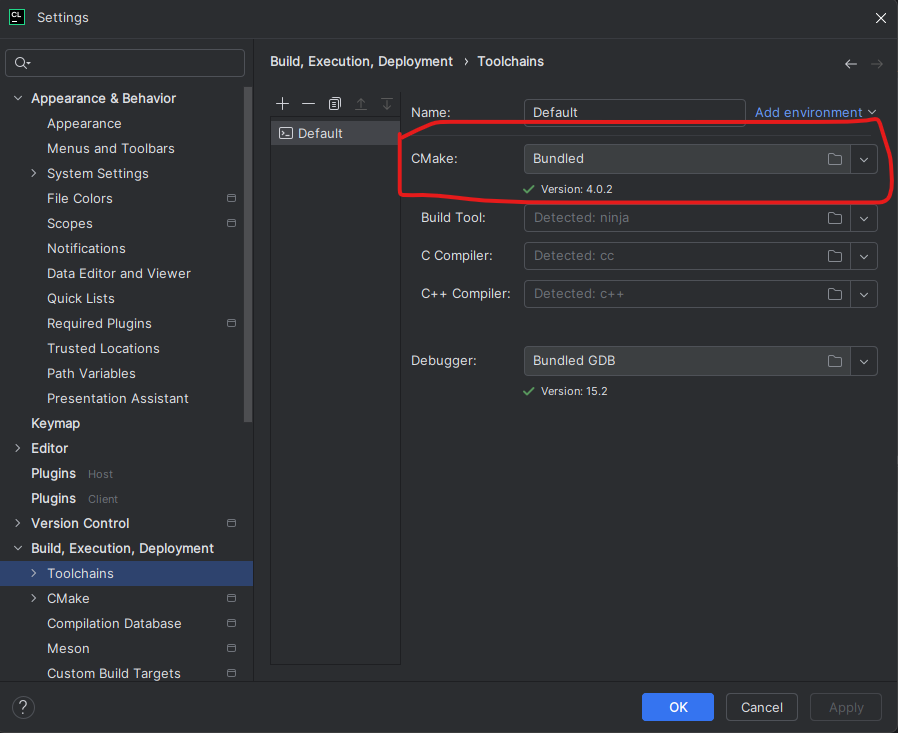
but our CMake version is 3.28, so it probably uses its own CMake:
Connecting with Invitation Link
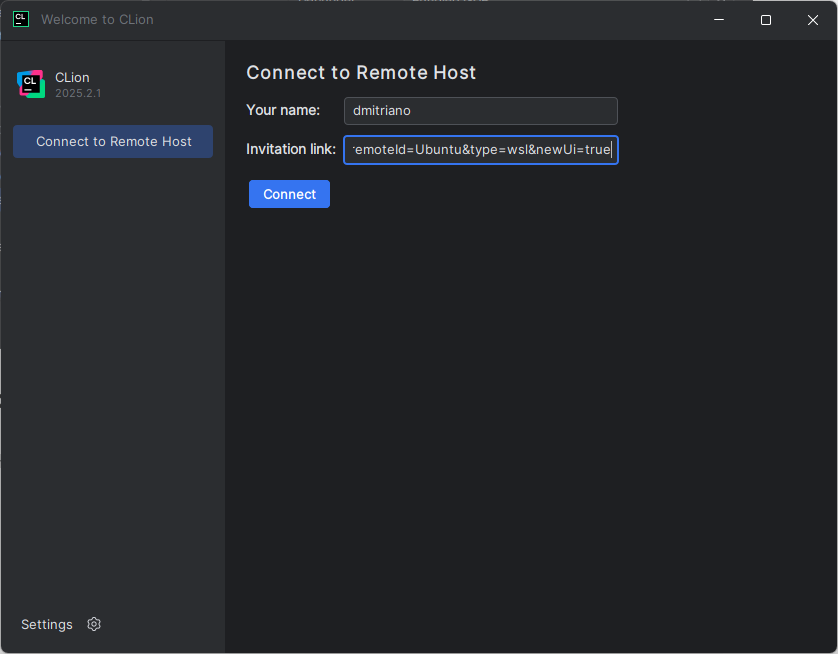
Link: gwws://127.0.0.1:63343/gateway/clientLink?uid=5410a986-1c72-4214-9634-e325577a39dd#jt=e7581695-f428-44e1-89c1-1738661dc0ab&p=CL&fp=6E70E24BAEDA071335A706605E4FC0B88CC0B3797997EC290090CF255803F70C&cb=252.25557.127&jb=21.0.8b1038.68>w_build=252.23892.426&remoteId=Ubuntu&type=wsl&newUi=true


Configure WSL
https://www.jetbrains.com/help/clion/how-to-use-wsl-development-environment-in-product.html#wsl-general
Using WSL toolchains in CLion on Windows
https://www.youtube.com/watch?v=xnwoCuHeHuY
Docker integration in CLion
https://www.youtube.com/watch?v=p7Bi-mOyelM
How do you install multiple, separate instances of Ubuntu in WSL?
https://stackoverflow.com/a/60428590/2394762
cd C:\Users\MattSlay
wsl –export Ubuntu ubuntu.tar
wsl –import UbuntuRuby .\UbuntuRuby ubuntu.tar
wsl –import UbuntuPython .\UbuntuPython ubuntu.tar
wsl –import UbuntuDotNet .\UbuntuDotNet ubuntu.tar
wsl -d UbuntuRuby