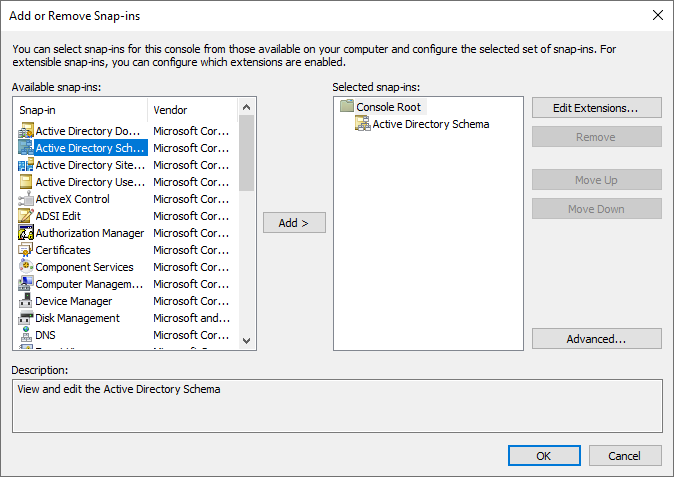
Register MMC Snapin:
regsvr32 schmmgmt.dll
Press Windows Key + R, type mmc, and press Enter. Go to File->Add or Remove Snapin:
Register MMC Snapin:
regsvr32 schmmgmt.dll
Press Windows Key + R, type mmc, and press Enter. Go to File->Add or Remove Snapin:
export ad_ip="10.15.7.15"
export ad_user="administrator@itdrde.local"
export ad_password="XXXXXXXXX"
ldapsearch -H ldap://$ad_ip:389 -x -D $ad_user -w $ad_password -b "DC=itdrde,DC=local" \
    -s sub -a always -z 1000 "(objectClass=user)" "serviceClassName" "serviceDNSName" "objectClass"
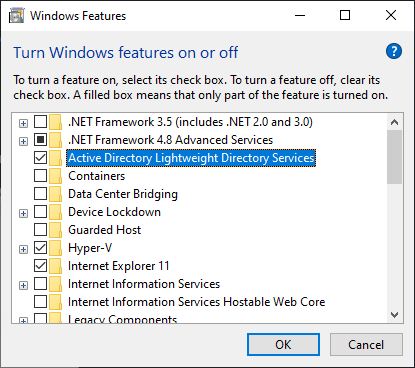
First run the following command as administrator to make Get-ADUser command work:
Get-WindowsCapability -Online | Where-Object {$_.Name -like "*ActiveDirectory.DS-LDS*"} | Add-WindowsCapability -Online
Path          :
Online        : True
RestartNeeded : False
Try the following commands:
$ad_ip = "10.15.7.15"
$ad_user = "administrator@itdrde.local"
Get-ADUser -Server $ad_ip -Credential $ad_user -Properties *
Get-CimInstance -ClassName Win32_ComputerSystem
Name             PrimaryOwnerName          Domain                   TotalPhysicalMemory      Model                    Manufacturer
----             ----------------          ------                   -------------------      -----                    ------------
DESKTOP-0DRJUG2  dmitriano@outlook.com     WORKGROUP                34213654528              Z390 AORUS PRO           Gigabyte Technology C...
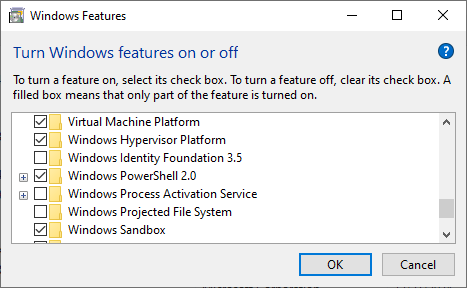
In addition to enabling Sandbox (a special purpose limited container) you also need to enable Windows Hypervisor Platform and also Virtual Machine platform:
PowerShell as Administrator:
PS C:\WINDOWS\system32> diskpart

Microsoft DiskPart version 10.0.19041.3636

Copyright (C) Microsoft Corporation.
On computer: DESKTOP-0DRJUG2

DISKPART> list disk

  Disk ###  Status         Size     Free     Dyn  Gpt
  --------  -------------  -------  -------  ---  ---
  Disk 0    Online          476 GB   476 GB        *
  Disk 1    Online         5589 GB  1024 KB        *
  Disk 2    Online         5589 GB  1024 KB        *
  Disk 3    Online          931 GB      0 B        *
  Disk 4    Online           14 GB      0 B
I installed MS Visual Studio, Android Studio and the following tools:
cmake-3.24.2-windows-x86_64
nasm-2.15.05
ninja-win
Python35
Strawberry
VulkanSDK
x86_64-12.2.0-release-win32-seh-rt_v10-rev0
and built QT for Windows with the following commands:
(more…)