Migrating the users and groups
Copied my groups from /etc/group:
dmitriano:x:1000:
slogpost:x:1001:www-data,bak
beauty:x:1009:www-data,bak
test1:x:1012:www-data,beauty,dmitriano,devnote,bak
test2:x:1013:www-data,bak
devnote:x:1018:www-data,bak
exchange:x:1025:
git:x:1026:www-data,bak
game:x:1027:www-data,bak
shar:x:1029:www-data,bak
bak:x:1032:
Copied my users from /etc/passwd:
dmitriano:x:1000:1000:Dmitry Efimov,,,:/home/dmitriano:/bin/bash
slogpost:x:1001:1001:,,,,:/home/slogpost:/bin/bash
beauty:x:1009:1009::/home/beauty:/bin/bash
test1:x:1012:1012::/home/test1:/bin/bash
test2:x:1013:1013::/home/test2:/bin/bash
devnote:x:1018:1018::/home/devnote:/bin/bash
exchange:x:1025:1025::/home/exchange:/bin/sh
game:x:1027:1027::/home/game:/bin/bash
git:x:1026:1026::/home/git:/bin/bash
shar:x:1029:1029::/home/shar:/bin/bash
bak:x:1032:1032::/home/bak:/bin/bash
and copied corresponding lines from /etc/shadow
Created home directories for all the users:
mkhomedir_helper dmitriano
mkhomedir_helper slogpost
mkhomedir_helper beauty
mkhomedir_helper test1
mkhomedir_helper test2
mkhomedir_helper devnote
mkhomedir_helper exchange
mkhomedir_helper game
mkhomedir_helper git
mkhomedir_helper shar
mkhomedir_helper bak

cd /home
sudo chmod o-rx *
Made my user a sudoer:
adduser dmitriano sudo
Enabling the Firewall
sudo ufw allow ssh
sudo ufw enable
Running OpenVPN
git clone https://github.com/dmitriano/dockovpn.git
sudo docker build -t alekslitvinenk/openvpn
export MY_IP=$(curl -s https://api.ipify.org)
sudo docker run -it --rm --cap-add=NET_ADMIN -p 1194:1194/udp -e HOST_ADDR=$MY_IP --name dockovpn alekslitvinenk/openvpn
sudo docker inspect dockovpn | grep IPAddress
wget -O client.ovpn http://172.17.0.2:8080
sudo ufw allow 1194/udp
Copying the certificates
Archived the certificates on the old machine and copied them to the new machine:
cd /etc/
sudo tar czf ~/work/bak/letsencrypt.tar.gz letsencrypt/
scp letsencrypt.tar.gz dmitriano@$NEW_IP:/home/dmitriano/work/bak/
Extracted them on the new machine:
cd /etc/
sudo tar xzf ~/work/bak/letsencrypt.tar.gz
Installing Squid
sudo apt install squid-openssl
sudo ufw allow 3128/tcp
telnet $NEW_IP 3128
Filtered comments and empty lines out in the Squid config:
grep -Ev "^[[:blank:]]*(#|$)" squid.conf.bak > squid.conf
And ensured that it works over HTTP with the following config:
acl localnet src 0.0.0.1-0.255.255.255  # RFC 1122 "this" network (LAN)
acl localnet src 10.0.0.0/8             # RFC 1918 local private network (LAN)
acl localnet src 100.64.0.0/10          # RFC 6598 shared address space (CGN)
acl localnet src 169.254.0.0/16         # RFC 3927 link-local (directly plugged) machines
acl localnet src 172.16.0.0/12          # RFC 1918 local private network (LAN)
acl localnet src 192.168.0.0/16         # RFC 1918 local private network (LAN)
acl localnet src fc00::/7               # RFC 4193 local private network range
acl localnet src fe80::/10              # RFC 4291 link-local (directly plugged) machines

acl SSL_ports port 443
acl Safe_ports port 80          # http
acl Safe_ports port 21          # ftp
acl Safe_ports port 443         # https
acl Safe_ports port 70          # gopher
acl Safe_ports port 210         # wais
acl Safe_ports port 1025-65535  # unregistered ports
acl Safe_ports port 280         # http-mgmt
acl Safe_ports port 488         # gss-http
acl Safe_ports port 591         # filemaker
acl Safe_ports port 777         # multiling http

http_access deny !Safe_ports
http_access deny CONNECT !SSL_ports
http_access allow localhost manager
http_access deny manager
http_access allow localhost
http_access deny to_localhost
http_access deny to_linklocal

include /etc/squid/conf.d/*.conf

#http_access deny all
http_port 3128

coredump_dir /var/spool/squid

refresh_pattern ^ftp:           1440    20%     10080
refresh_pattern -i (/cgi-bin/|\?) 0     0%      0
refresh_pattern \/(Packages|Sources)(|\.bz2|\.gz|\.xz)$ 0 0% 0 refresh-ims
refresh_pattern \/Release(|\.gpg)$ 0 0% 0 refresh-ims
refresh_pattern \/InRelease$ 0 0% 0 refresh-ims
refresh_pattern \/(Translation-.*)(|\.bz2|\.gz|\.xz)$ 0 0% 0 refresh-ims
refresh_pattern .               0       20%     4320
From my Windows 10 machine:
"C:\Program Files\Google\Chrome\Application\chrome.exe" --proxy-server=172.236.29.157:3128
And with curl:
curl -x developernote.com:3128 --proxy-user guest:<password> -L http://api.ipify.org/
Enabled HTTPS:
sudo apt install apache2-utils
sudo htpasswd -Bc squid-password guest
sudo ufw delete allow 3128/tcp
sudo ufw allow 3129/tcp
updated the config as follows:
auth_param basic program /usr/lib/squid/basic_ncsa_auth /etc/squid/squid-password
acl guests proxy_auth REQUIRED

acl localnet src 0.0.0.1-0.255.255.255  # RFC 1122 "this" network (LAN)
acl localnet src 10.0.0.0/8             # RFC 1918 local private network (LAN)
acl localnet src 100.64.0.0/10          # RFC 6598 shared address space (CGN)
acl localnet src 169.254.0.0/16         # RFC 3927 link-local (directly plugged) machines
acl localnet src 172.16.0.0/12          # RFC 1918 local private network (LAN)
acl localnet src 192.168.0.0/16         # RFC 1918 local private network (LAN)
acl localnet src fc00::/7               # RFC 4193 local private network range
acl localnet src fe80::/10              # RFC 4291 link-local (directly plugged) machines

acl SSL_ports port 443
acl Safe_ports port 80          # http
acl Safe_ports port 21          # ftp
acl Safe_ports port 443         # https
acl Safe_ports port 70          # gopher
acl Safe_ports port 210         # wais
acl Safe_ports port 1025-65535  # unregistered ports
acl Safe_ports port 280         # http-mgmt
acl Safe_ports port 488         # gss-http
acl Safe_ports port 591         # filemaker
acl Safe_ports port 777         # multiling http

http_access deny !Safe_ports
http_access deny CONNECT !SSL_ports
http_access allow localhost manager
http_access deny manager
http_access allow localhost
http_access deny to_localhost
http_access deny to_linklocal
http_access allow guests

include /etc/squid/conf.d/*.conf

http_access deny all
http_port 3128

#https_port 3129 tls-cert=/etc/letsencrypt/live/developernote.com/fullchain.pem tls-key=/etc/letsencrypt/live/developernote.com/privkey.pem generate-host-certificates=on dynamic_cert_mem_cache_size=4MB
#sslcrtd_program /lib/squid/security_file_certgen -c -s /var/lib/squid/ssl_db -M 4MB

https_port 3129 connection-auth=off tls-cert=/etc/letsencrypt/live/developernote.com/fullchain.pem tls-key=/etc/letsencrypt/live/developernote.com/privkey.pem

coredump_dir /var/spool/squid

refresh_pattern ^ftp:           1440    20%     10080
refresh_pattern -i (/cgi-bin/|\?) 0     0%      0
refresh_pattern \/(Packages|Sources)(|\.bz2|\.gz|\.xz)$ 0 0% 0 refresh-ims
refresh_pattern \/Release(|\.gpg)$ 0 0% 0 refresh-ims
refresh_pattern \/InRelease$ 0 0% 0 refresh-ims
refresh_pattern \/(Translation-.*)(|\.bz2|\.gz|\.xz)$ 0 0% 0 refresh-ims
refresh_pattern .               0       20%     4320
and tested it with curl:
curl -x https://developernote.com:3129 --proxy-user guest:<password> -L https://api.ipify.org/
and with Google Chrome:
"C:\Program Files\Google\Chrome\Application\chrome.exe" --proxy-server=https://herb.developernote.com:3129
Moved my config to a separate file conf.d/my.conf:
auth_param basic program /usr/lib/squid/basic_ncsa_auth /etc/squid/squid-password
acl guests proxy_auth REQUIRED

http_access allow guests

https_port 3129 connection-auth=off tls-cert=/etc/letsencrypt/live/developernote.com/fullchain.pem tls-key=/etc/letsencrypt/live/developernote.com/privkey.pem
with default squid.conf:
sudo grep -Ev "^[[:blank:]]*(#|$)" squid.conf.bak | sudo tee squid.conf > /dev/null
Installing MySQL
On my old machine:
grep -ri bind-address .
./mysql.conf.d/mysqld.cnf:#bind-address         = 127.0.0.1
./mysql.conf.d/mysqld.cnf:bind-address            = 0.0.0.0
probably I connected to MySQL from my home Windows machine, but on the new machine I left default configuration.
sudo apt install mysql-server
sudo service mysql status
sudo ss -tap | grep mysql
LISTEN 0      151                  127.0.0.1:mysql                 0.0.0.0:*     users:(("mysqld",pid=22950,fd=23))
LISTEN 0      70                   127.0.0.1:33060                 0.0.0.0:*     users:(("mysqld",pid=22950,fd=21))
sudo journalctl -u mysql
Jan 17 14:12:44 localhost systemd[1]: Starting mysql.service - MySQL Community Server...
Jan 17 14:12:45 localhost systemd[1]: Started mysql.service - MySQL Community Server.
Tried to follow this guide to set MySQL root password:
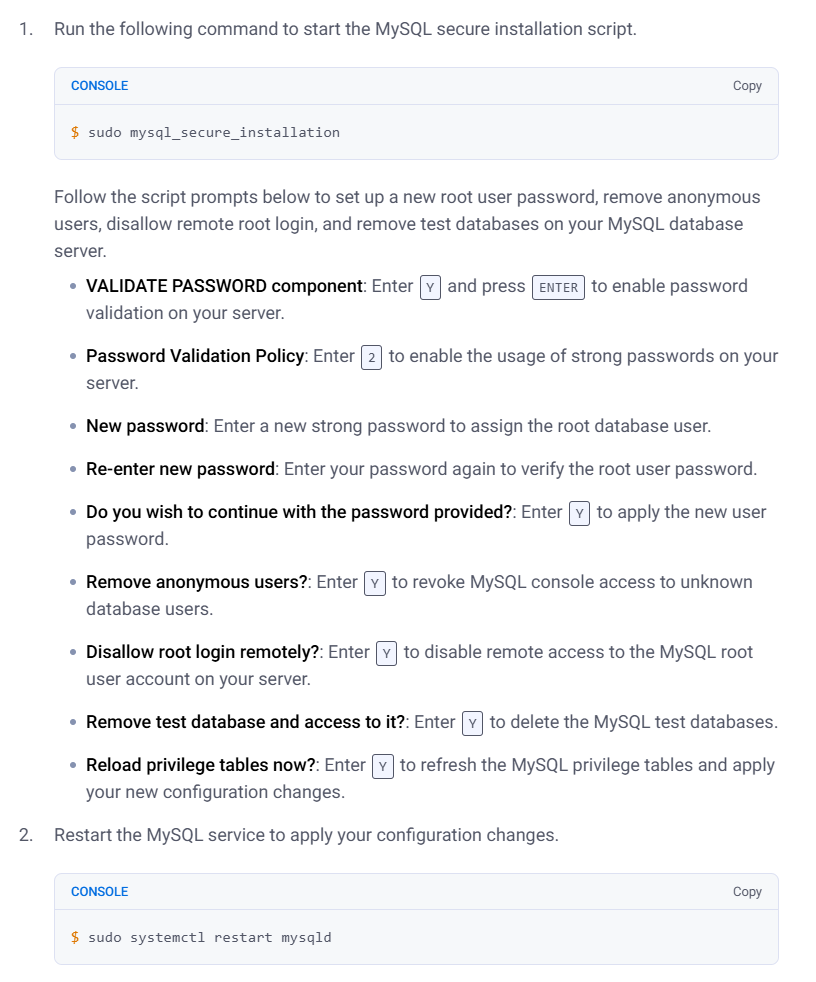
sudo mysql_secure_installation
sudo service mysql restart
But got this:
Securing the MySQL server deployment.

Connecting to MySQL using a blank password.

VALIDATE PASSWORD COMPONENT can be used to test passwords
and improve security. It checks the strength of password
and allows the users to set only those passwords which are
secure enough. Would you like to setup VALIDATE PASSWORD component?

Press y|Y for Yes, any other key for No: y

There are three levels of password validation policy:

LOW    Length >= 8
MEDIUM Length >= 8, numeric, mixed case, and special characters
STRONG Length >= 8, numeric, mixed case, special characters and dictionary                  file

Please enter 0 = LOW, 1 = MEDIUM and 2 = STRONG: 2

Skipping password set for root as authentication with auth_socket is used by default.
If you would like to use password authentication instead, this can be done with the "ALTER_USER" command.
See https://dev.mysql.com/doc/refman/8.0/en/alter-user.html#alter-user-password-management for more information.

By default, a MySQL installation has an anonymous user,
allowing anyone to log into MySQL without having to have
a user account created for them. This is intended only for
testing, and to make the installation go a bit smoother.
You should remove them before moving into a production
environment.

Remove anonymous users? (Press y|Y for Yes, any other key for No) : y
Success.


Normally, root should only be allowed to connect from
'localhost'. This ensures that someone cannot guess at
the root password from the network.

Disallow root login remotely? (Press y|Y for Yes, any other key for No) : y
Success.

By default, MySQL comes with a database named 'test' that
anyone can access. This is also intended only for testing,
and should be removed before moving into a production
environment.


Remove test database and access to it? (Press y|Y for Yes, any other key for No) : y
 - Dropping test database...
Success.

 - Removing privileges on test database...
Success.

Reloading the privilege tables will ensure that all changes
made so far will take effect immediately.

Reload privilege tables now? (Press y|Y for Yes, any other key for No) : y
Success.

All done!
Next attempt. Answered N,Y,Y,Y,Y:
Securing the MySQL server deployment.

Connecting to MySQL using a blank password.

VALIDATE PASSWORD COMPONENT can be used to test passwords
and improve security. It checks the strength of password
and allows the users to set only those passwords which are
secure enough. Would you like to setup VALIDATE PASSWORD component?

Press y|Y for Yes, any other key for No:

Skipping password set for root as authentication with auth_socket is used by default.
If you would like to use password authentication instead, this can be done with the "ALTER_USER" command.
See https://dev.mysql.com/doc/refman/8.0/en/alter-user.html#alter-user-password-management for more information.

By default, a MySQL installation has an anonymous user,
allowing anyone to log into MySQL without having to have
a user account created for them. This is intended only for
testing, and to make the installation go a bit smoother.
You should remove them before moving into a production
environment.

Remove anonymous users? (Press y|Y for Yes, any other key for No) : y
Success.


Normally, root should only be allowed to connect from
'localhost'. This ensures that someone cannot guess at
the root password from the network.

Disallow root login remotely? (Press y|Y for Yes, any other key for No) : y
Success.

By default, MySQL comes with a database named 'test' that
anyone can access. This is also intended only for testing,
and should be removed before moving into a production
environment.


Remove test database and access to it? (Press y|Y for Yes, any other key for No) : y
 - Dropping test database...
Success.

 - Removing privileges on test database...
Success.

Reloading the privilege tables will ensure that all changes
made so far will take effect immediately.

Reload privilege tables now? (Press y|Y for Yes, any other key for No) : y
Success.

All done!
After that I set the root password as follows:
sudo mysql
SELECT user,authentication_string FROM mysql.user;
ALTER USER 'root'@'localhost' IDENTIFIED WITH mysql_native_password BY '********';
SELECT user,authentication_string FROM mysql.user;
FLUSH PRIVILEGES;
mysql -u root -p
I deleted all the binary logs:
PURGE BINARY LOGS BEFORE NOW();
then according to MySQL docs:

I disabled them by adding
skip-log-bin
to /etc/mysql/mysql.conf.d/mysqld.cnf
and checked the value of log_bin configuration option:
SELECT @@GLOBAL.log_bin, @@GLOBAL.version;
+------------------+-------------------------+
| @@GLOBAL.log_bin | @@GLOBAL.version        |
+------------------+-------------------------+
|                0 | 8.0.40-0ubuntu0.24.04.1 |
+------------------+-------------------------+
1 row in set (0.00 sec)
The space required for two databases shar and shogpost:
du -ha --max-depth=1 | sort -h
0       ./debian-5.7.flag
4.0K    ./auto.cnf
4.0K    ./binlog.000186
4.0K    ./binlog.index
4.0K    ./ca-key.pem
4.0K    ./ca.pem
4.0K    ./client-cert.pem
4.0K    ./client-key.pem
4.0K    ./localhost.pid
4.0K    ./private_key.pem
4.0K    ./public_key.pem
4.0K    ./server-cert.pem
4.0K    ./server-key.pem
8.0K    ./ib_buffer_pool
36K     ./mysql
116K    ./sys
192K    ./#ib_16384_0.dblwr
804K    ./#innodb_temp
1.7M    ./performance_schema
8.2M    ./#ib_16384_1.dblwr
12M     ./ibdata1
12M     ./ibtmp1
16M     ./undo_001
16M     ./undo_002
19M     ./shar
28M     ./mysql.ibd
101M    ./#innodb_redo
183M    ./slogpost
397M    .
Installing my bash scripts
Cloned bbs /usr/local and appended :/usr/local/bbs to /etc/environment.
Installing Nginx
sudo apt install nginx
Installing PHP
Installed the following PHP packages (without php that installs apache):
sudo apt install php-fpm php-cli php-mysql php-dom php-mbstring php-gd php-curl php-imagick php-zip php-intl
Reading package lists... Done
Building dependency tree... Done
Reading state information... Done
Note, selecting 'php8.3-xml' instead of 'php-dom'
The following additional packages will be installed:
  php-common php8.3-cli php8.3-common php8.3-fpm php8.3-mbstring php8.3-mysql php8.3-opcache php8.3-readline
Suggested packages:
  php-pear
The following NEW packages will be installed:
  php-cli php-common php-fpm php-mbstring php-mysql php8.3-cli php8.3-common php8.3-fpm php8.3-mbstring php8.3-mysql php8.3-opcache php8.3-readline php8.3-xml
0 upgraded, 13 newly installed, 0 to remove and 4 not upgraded.
Need to get 5,753 kB of archives.
After this operation, 24.8 MB of additional disk space will be used.
Do you want to continue? [Y/n]
Get:1 http://mirrors.linode.com/ubuntu noble/main amd64 php-common all 2:93ubuntu2 [13.9 kB]
Get:2 http://mirrors.linode.com/ubuntu noble-updates/main amd64 php8.3-common amd64 8.3.6-0ubuntu0.24.04.3 [739 kB]
Get:3 http://mirrors.linode.com/ubuntu noble-updates/main amd64 php8.3-opcache amd64 8.3.6-0ubuntu0.24.04.3 [372 kB]
Get:4 http://mirrors.linode.com/ubuntu noble-updates/main amd64 php8.3-readline amd64 8.3.6-0ubuntu0.24.04.3 [13.5 kB]
Get:5 http://mirrors.linode.com/ubuntu noble-updates/main amd64 php8.3-cli amd64 8.3.6-0ubuntu0.24.04.3 [1,914 kB]
Get:6 http://mirrors.linode.com/ubuntu noble/main amd64 php-cli all 2:8.3+93ubuntu2 [4,584 B]
Get:7 http://mirrors.linode.com/ubuntu noble-updates/universe amd64 php8.3-fpm amd64 8.3.6-0ubuntu0.24.04.3 [1,924 kB]
Get:8 http://mirrors.linode.com/ubuntu noble/universe amd64 php-fpm all 2:8.3+93ubuntu2 [4,162 B]
Get:9 http://mirrors.linode.com/ubuntu noble-updates/main amd64 php8.3-mbstring amd64 8.3.6-0ubuntu0.24.04.3 [512 kB]
Get:10 http://mirrors.linode.com/ubuntu noble/universe amd64 php-mbstring all 2:8.3+93ubuntu2 [1,848 B]
Get:11 http://mirrors.linode.com/ubuntu noble-updates/main amd64 php8.3-mysql amd64 8.3.6-0ubuntu0.24.04.3 [127 kB]
Get:12 http://mirrors.linode.com/ubuntu noble/main amd64 php-mysql all 2:8.3+93ubuntu2 [1,838 B]
Get:13 http://mirrors.linode.com/ubuntu noble-updates/main amd64 php8.3-xml amd64 8.3.6-0ubuntu0.24.04.3 [126 kB]
Fetched 5,753 kB in 0s (81.5 MB/s)
Selecting previously unselected package php-common.
(Reading database ... 90359 files and directories currently installed.)
Preparing to unpack .../00-php-common_2%3a93ubuntu2_all.deb ...
Unpacking php-common (2:93ubuntu2) ...
Selecting previously unselected package php8.3-common.
Preparing to unpack .../01-php8.3-common_8.3.6-0ubuntu0.24.04.3_amd64.deb ...
Unpacking php8.3-common (8.3.6-0ubuntu0.24.04.3) ...
Selecting previously unselected package php8.3-opcache.
Preparing to unpack .../02-php8.3-opcache_8.3.6-0ubuntu0.24.04.3_amd64.deb ...
Unpacking php8.3-opcache (8.3.6-0ubuntu0.24.04.3) ...
Selecting previously unselected package php8.3-readline.
Preparing to unpack .../03-php8.3-readline_8.3.6-0ubuntu0.24.04.3_amd64.deb ...
Unpacking php8.3-readline (8.3.6-0ubuntu0.24.04.3) ...
Selecting previously unselected package php8.3-cli.
Preparing to unpack .../04-php8.3-cli_8.3.6-0ubuntu0.24.04.3_amd64.deb ...
Unpacking php8.3-cli (8.3.6-0ubuntu0.24.04.3) ...
Selecting previously unselected package php-cli.
Preparing to unpack .../05-php-cli_2%3a8.3+93ubuntu2_all.deb ...
Unpacking php-cli (2:8.3+93ubuntu2) ...
Selecting previously unselected package php8.3-fpm.
Preparing to unpack .../06-php8.3-fpm_8.3.6-0ubuntu0.24.04.3_amd64.deb ...
Unpacking php8.3-fpm (8.3.6-0ubuntu0.24.04.3) ...
Selecting previously unselected package php-fpm.
Preparing to unpack .../07-php-fpm_2%3a8.3+93ubuntu2_all.deb ...
Unpacking php-fpm (2:8.3+93ubuntu2) ...
Selecting previously unselected package php8.3-mbstring.
Preparing to unpack .../08-php8.3-mbstring_8.3.6-0ubuntu0.24.04.3_amd64.deb ...
Unpacking php8.3-mbstring (8.3.6-0ubuntu0.24.04.3) ...
Selecting previously unselected package php-mbstring.
Preparing to unpack .../09-php-mbstring_2%3a8.3+93ubuntu2_all.deb ...
Unpacking php-mbstring (2:8.3+93ubuntu2) ...
Selecting previously unselected package php8.3-mysql.
Preparing to unpack .../10-php8.3-mysql_8.3.6-0ubuntu0.24.04.3_amd64.deb ...
Unpacking php8.3-mysql (8.3.6-0ubuntu0.24.04.3) ...
Selecting previously unselected package php-mysql.
Preparing to unpack .../11-php-mysql_2%3a8.3+93ubuntu2_all.deb ...
Unpacking php-mysql (2:8.3+93ubuntu2) ...
Selecting previously unselected package php8.3-xml.
Preparing to unpack .../12-php8.3-xml_8.3.6-0ubuntu0.24.04.3_amd64.deb ...
Unpacking php8.3-xml (8.3.6-0ubuntu0.24.04.3) ...
Setting up php-common (2:93ubuntu2) ...
Created symlink /etc/systemd/system/timers.target.wants/phpsessionclean.timer → /usr/lib/systemd/system/phpsessionclean.timer.
Setting up php8.3-common (8.3.6-0ubuntu0.24.04.3) ...

Creating config file /etc/php/8.3/mods-available/calendar.ini with new version

Creating config file /etc/php/8.3/mods-available/ctype.ini with new version

Creating config file /etc/php/8.3/mods-available/exif.ini with new version

Creating config file /etc/php/8.3/mods-available/fileinfo.ini with new version

Creating config file /etc/php/8.3/mods-available/ffi.ini with new version

Creating config file /etc/php/8.3/mods-available/ftp.ini with new version

Creating config file /etc/php/8.3/mods-available/gettext.ini with new version

Creating config file /etc/php/8.3/mods-available/iconv.ini with new version

Creating config file /etc/php/8.3/mods-available/pdo.ini with new version

Creating config file /etc/php/8.3/mods-available/phar.ini with new version

Creating config file /etc/php/8.3/mods-available/posix.ini with new version

Creating config file /etc/php/8.3/mods-available/shmop.ini with new version

Creating config file /etc/php/8.3/mods-available/sockets.ini with new version

Creating config file /etc/php/8.3/mods-available/sysvmsg.ini with new version

Creating config file /etc/php/8.3/mods-available/sysvsem.ini with new version

Creating config file /etc/php/8.3/mods-available/sysvshm.ini with new version

Creating config file /etc/php/8.3/mods-available/tokenizer.ini with new version
Setting up php8.3-mysql (8.3.6-0ubuntu0.24.04.3) ...

Creating config file /etc/php/8.3/mods-available/mysqlnd.ini with new version

Creating config file /etc/php/8.3/mods-available/mysqli.ini with new version

Creating config file /etc/php/8.3/mods-available/pdo_mysql.ini with new version
Setting up php8.3-mbstring (8.3.6-0ubuntu0.24.04.3) ...

Creating config file /etc/php/8.3/mods-available/mbstring.ini with new version
Setting up php8.3-readline (8.3.6-0ubuntu0.24.04.3) ...

Creating config file /etc/php/8.3/mods-available/readline.ini with new version
Setting up php8.3-xml (8.3.6-0ubuntu0.24.04.3) ...

Creating config file /etc/php/8.3/mods-available/dom.ini with new version

Creating config file /etc/php/8.3/mods-available/simplexml.ini with new version

Creating config file /etc/php/8.3/mods-available/xml.ini with new version

Creating config file /etc/php/8.3/mods-available/xmlreader.ini with new version

Creating config file /etc/php/8.3/mods-available/xmlwriter.ini with new version

Creating config file /etc/php/8.3/mods-available/xsl.ini with new version
Setting up php8.3-opcache (8.3.6-0ubuntu0.24.04.3) ...

Creating config file /etc/php/8.3/mods-available/opcache.ini with new version
Setting up php-mysql (2:8.3+93ubuntu2) ...
Setting up php8.3-cli (8.3.6-0ubuntu0.24.04.3) ...
update-alternatives: using /usr/bin/php8.3 to provide /usr/bin/php (php) in auto mode
update-alternatives: using /usr/bin/phar8.3 to provide /usr/bin/phar (phar) in auto mode
update-alternatives: using /usr/bin/phar.phar8.3 to provide /usr/bin/phar.phar (phar.phar) in auto mode

Creating config file /etc/php/8.3/cli/php.ini with new version
Setting up php-mbstring (2:8.3+93ubuntu2) ...
Setting up php-cli (2:8.3+93ubuntu2) ...
update-alternatives: using /usr/bin/php.default to provide /usr/bin/php (php) in auto mode
update-alternatives: using /usr/bin/phar.default to provide /usr/bin/phar (phar) in auto mode
update-alternatives: using /usr/bin/phar.phar.default to provide /usr/bin/phar.phar (phar.phar) in auto mode
Setting up php8.3-fpm (8.3.6-0ubuntu0.24.04.3) ...

Creating config file /etc/php/8.3/fpm/php.ini with new version
Created symlink /etc/systemd/system/multi-user.target.wants/php8.3-fpm.service → /usr/lib/systemd/system/php8.3-fpm.service.
Setting up php-fpm (2:8.3+93ubuntu2) ...
Processing triggers for man-db (2.12.0-4build2) ...
Processing triggers for php8.3-cli (8.3.6-0ubuntu0.24.04.3) ...
Processing triggers for php8.3-fpm (8.3.6-0ubuntu0.24.04.3) ...
Scanning processes...
Scanning linux images...

Running kernel seems to be up-to-date.

No services need to be restarted.

No containers need to be restarted.

No user sessions are running outdated binaries.

No VM guests are running outdated hypervisor (qemu) binaries on this host.
Added firewall rules:
sudo ufw allow http
sudo ufw allow https
And got this:

Copied configs:
cd /var/log
sudo mkdir php-my
/etc/php/8.3/fpm/socket-owner.conf:
; Set permissions for unix socket, if one is used. In Linux, read/write
; permissions must be set in order to allow connections from a web server. Many
; BSD-derived systems allow connections regardless of permissions.
; Default Values: user and group are set as the running user
;                 mode is set to 0660
listen.owner = www-data
listen.group = www-data
listen.mode = 0660
/etc/php/8.3/fpm/pool.d/slogpost.conf:
[slogpost]

user = nobody
group = slogpost

listen = /run/php/www-slogpost.sock
include=/etc/php/8.3/fpm/socket-owner.conf

pm = ondemand

pm.max_children = 10
pm.start_servers = 0
pm.min_spare_servers = 0
pm.max_spare_servers = 1
pm.max_requests = 500

slowlog = /var/log/php-my/$pool.slow.log
request_slowlog_timeout = 5s
request_terminate_timeout = 300s

chdir = /
Restarted the service:
sudo service nginx reload
sudo service php8.3-fpm reload
But the website displayed an error. I added
define( 'WP_DEBUG', true );
define( 'WP_DEBUG_LOG', true );
to wp-config.php and it displayed the following errors related to post-password-token-sidebar:
Notice: Function wp_register_script was called incorrectly. Scripts and styles should not be registered or enqueued until the wp_enqueue_scripts, admin_enqueue_scripts, or login_enqueue_scripts hooks. This notice was triggered by the post-password-token-sidebar handle. Please see Debugging in WordPress for more information. (This message was added in version 3.3.0.) in /home/slogpost/www/wp-includes/functions.php on line 6078

Notice: Function wp_register_style was called incorrectly. Scripts and styles should not be registered or enqueued until the wp_enqueue_scripts, admin_enqueue_scripts, or login_enqueue_scripts hooks. This notice was triggered by the post-password-token-sidebar handle. Please see Debugging in WordPress for more information. (This message was added in version 3.3.0.) in /home/slogpost/www/wp-includes/functions.php on line 6078

Notice: Function is_feed was called incorrectly. Conditional query tags do not work before the query is run. Before then, they always return false. Please see Debugging in WordPress for more information. (This message was added in version 3.1.0.) in /home/slogpost/www/wp-includes/functions.php on line 6078

Notice: Функция register_sidebar вызвана неправильно. В массиве аргументов для боковой колонки «Боковая колонка 1» не задан параметр id. Присвоенное по умолчанию значение равно «sidebar-1». Чтобы убрать это сообщение и сохранить текущее содержимое боковой колонки, задайте вручную параметр id, равный «sidebar-1». Дополнительную информацию можно найти на странице «Отладка в WordPress». (Это сообщение было добавлено в версии 4.2.0.) in /home/slogpost/www/wp-includes/functions.php on line 6078

Fatal error: Uncaught ArgumentCountError: Too few arguments to function WP_Widget::__construct(), 0 passed in /home/slogpost/www/wp-includes/class-wp-widget-factory.php on line 62 and at least 2 expected in /home/slogpost/www/wp-includes/class-wp-widget.php:163 Stack trace: #0 /home/slogpost/www/wp-includes/class-wp-widget-factory.php(62): WP_Widget->__construct() #1 /home/slogpost/www/wp-includes/widgets.php(115): WP_Widget_Factory->register() #2 /home/slogpost/www/wp-content/plugins/simple-microblogging/simple-microblogging.php(50): register_widget() #3 /home/slogpost/www/wp-includes/class-wp-hook.php(324): ahspfc_load_widgets() #4 /home/slogpost/www/wp-includes/class-wp-hook.php(348): WP_Hook->apply_filters() #5 /home/slogpost/www/wp-includes/plugin.php(517): WP_Hook->do_action() #6 /home/slogpost/www/wp-includes/widgets.php(1862): do_action() #7 /home/slogpost/www/wp-includes/class-wp-hook.php(324): wp_widgets_init() #8 /home/slogpost/www/wp-includes/class-wp-hook.php(348): WP_Hook->apply_filters() #9 /home/slogpost/www/wp-includes/plugin.php(517): WP_Hook->do_action() #10 /home/slogpost/www/wp-settings.php(695): do_action() #11 /home/slogpost/www/wp-config.php(79): require_once('...') #12 /home/slogpost/www/wp-load.php(50): require_once('...') #13 /home/slogpost/www/wp-blog-header.php(13): require_once('...') #14 /home/slogpost/www/index.php(17): require('...') #15 {main} thrown in /home/slogpost/www/wp-includes/class-wp-widget.php on line 163
I disabled all the plugins:
use slogpost;
show tables;
select * from wp_options where option_name='active_plugins';
update wp_options set option_value='a:0:{}' where option_name='active_plugins';
The website started to work, but there still was an error message:
Notice: Функция register_sidebar вызвана неправильно. В массиве аргументов для боковой колонки «Боковая колонка 1» не задан параметр id. Присвоенное по умолчанию значение равно «sidebar-1». Чтобы убрать это сообщение и сохранить текущее содержимое боковой колонки, задайте вручную параметр id, равный «sidebar-1». Дополнительную информацию можно найти на странице «Отладка в WordPress». (Это сообщение было добавлено в версии 4.2.0.) in /home/slogpost/www/wp-includes/functions.php on line 6078
I switched to Docu theme and the message has disappeared.
Settings the time zone
sudo timedatectl set-timezone Europe/Moscow
timedatectl status | grep "Time zone"
Migrating PHP5.3 website
Loaded PHP5.3 docker image and run the container:
# Old machine:
sudo docker save -o php53-image.tar c8a8315b4970

# New machine:
sudo docker load -i php53-image.tar
sudo docker tag c8a8315b4970 u12php53
sudo docker run -d --rm --name php53 -v /home/beauty/www:/home/beauty/www c8a8315b4970
sudo docker inspect df9a148e57fc
Fortunately, it started with the same IP addresses as on old machine:
                    "Gateway": "172.17.0.1",
                    "IPAddress": "172.17.0.2",
Then I started MySQL5.7:
sudo docker run --rm --name mysql57 -e MYSQL_ROOT_PASSWORD=$MROOTPASS -p 3306:3306 -d mysql:5.7
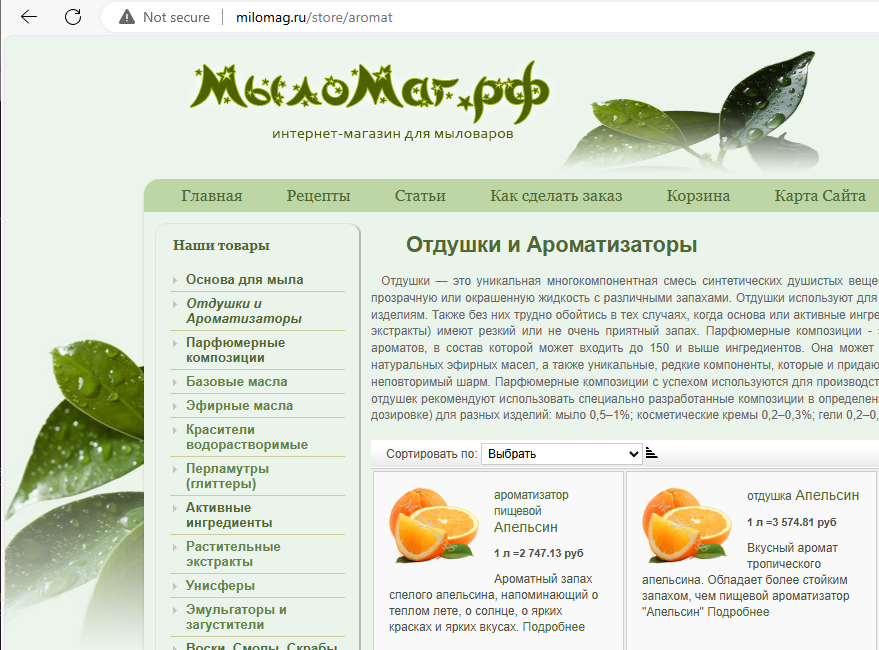
and restored the website:
sudo su - beauty
export MHOST=172.17.0.1
export MROOTPASS=*******
resite.sh beauty.2022-10-04-2141.tar.gz
mysql -u beauty -h172.17.0.1 -p
and it started to work:
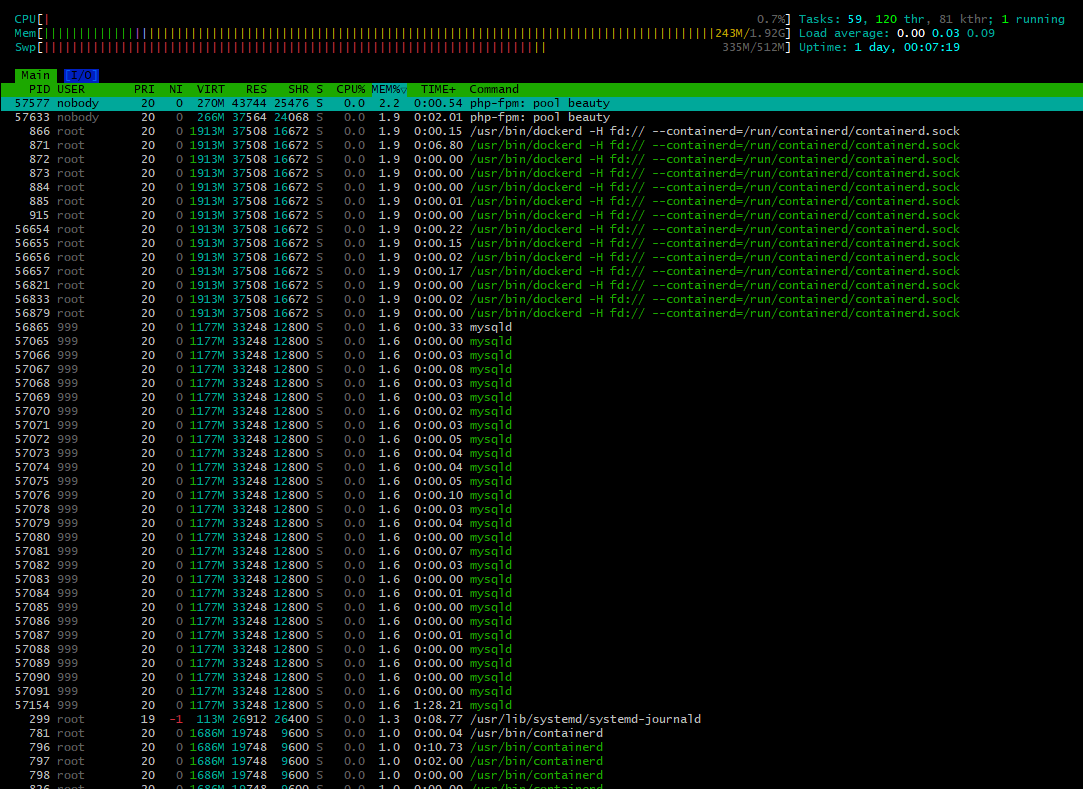
and consumed some resources:
I removed unused pools in the container:
sudo docker exec -it php53 bash
rm master.conf omegauto.conf www.conf
service php5-fpm restart
exit
sudo docker commit php53 php53fix1
Old MySQL version: mysql Ver 14.14 Distrib 5.7.44, for Linux (x86_64) using EditLine wrapper
Docker’s MySQL version:
sudo docker exec 501f73f32b03 mysql --version
mysql Ver 14.14 Distrib 5.5.54, for debian-linux-gnu (x86_64) using readline 6.2
With MySQL8 my website looks like this some pages do not open:

Extracting website archive with MySQL8:
export MROOTPASS=*******
export CREATE_REMOTE_USER=1
export MYSQL8_COMPAT=1
resite.sh beauty.2022-10-04-2141.tar.gz
Tried to build my 5.5.9 PHP5.3 docker container on Ubuntu 14.4:
cd ~/dev/repos/DockerLemp/u1204php53
sh/build.sh
cat run1.sh
but web browser displayed this:
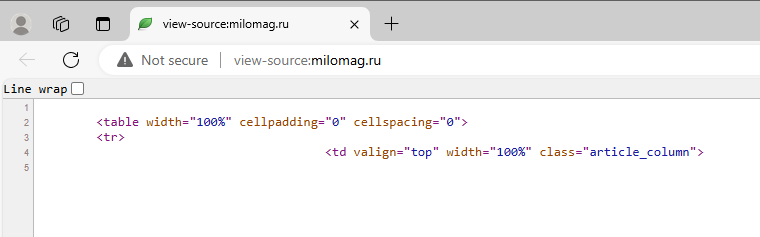
I fixed this by removing pool.d/www.conf, but got
PHP message: PHP Fatal error: Call-time pass-by-reference has been removed in /home/beauty/www/plugins/content/listitems.php on line 95
because with Ubuntu14.4 PHP version was 5.5.9, but not 5.3.
Tried the following Dockerfile:
FROM devilbox/php-fpm-5.3:latest

RUN useradd -d /home/beauty -m --uid 1009 beauty

EXPOSE 9000
CMD ["php-fpm"]
but got
Database Error: Unable to connect to the database:The MySQL adapter "mysqli" is not available.
error in the browser. Listed PHP modules:
[PHP Modules]
Core
ctype
curl
date
dom
ereg
fileinfo
filter
ftp
hash
iconv
json
libxml
mbstring
mhash
mysqlnd
openssl
pcre
PDO
pdo_sqlite
Phar
posix
readline
recode
Reflection
session
SimpleXML
SPL
SQLite
sqlite3
standard
tokenizer
xml
xmlreader
xmlwriter
zlib

[Zend Modules]
Mysqlnd is the library/the driver to communicate with the Mysql server, both PDO and mysqli use it. I replaced mysqli with mysqlnd in Joomla config, but got the following error in the browser:
JError Unable to load Database Driver:mysqlnd
Checking the disk space used by Docker
dmitriano@localhost:~$ sudo docker ps --size
CONTAINER ID   IMAGE                    COMMAND                  CREATED       STATUS       PORTS                                                 NAMES                 SIZE
9a66d67fc062   u12php53                 "supervisord -n"         3 hours ago   Up 3 hours   9000/tcp                                              php53                 144kB (virtual 280MB)
1569896fc244   alekslitvinenk/openvpn   "dumb-init ./start.s…"   4 days ago    Up 2 days    0.0.0.0:1194->1194/udp, :::1194->1194/udp, 8080/tcp   dockovpn_dockovpn_1   10.2kB (virtual 17.4MB)

dmitriano@localhost:~$ sudo docker system df
TYPE            TOTAL     ACTIVE    SIZE      RECLAIMABLE
Images          4         2         799MB     781.6MB (97%)
Containers      2         2         153.7kB   0B (0%)
Local Volumes   4         0         206.9MB   206.9MB (100%)
Build Cache     120       0         915.3MB   915.3MB

root@localhost:/# du -ha --max-depth=1
4.0K    ./media
4.0K    ./bin.usr-is-merged
16K     ./opt
2.1M    ./dev
0       ./lib64
4.0K    ./lib.usr-is-merged
2.9G    ./usr
0       ./lib
95M     ./boot
12G     ./home
0       ./sys
0       ./bin
8.0K    ./snap
6.6G    ./var
4.0K    ./srv
84K     ./tmp
216K    ./root
0       ./sbin
4.0K    ./mnt
16K     ./lost+found
1.3M    ./run
4.0K    ./sbin.usr-is-merged
16M     ./etc
21G     .


https://github.com/diladele/squid-ubuntu
The default version of Ubuntu 24.04 noble comes with both squid and squid-openssl packages. If you already installed squid package, uninstall it first and then install squid-openssl package.
sudo apt-get install squid-openssl
Enable TLS caching with squid using the https_port directive
https://stackoverflow.com/questions/78235077/enable-tls-caching-with-squid-using-the-https-port-directive
https_port 3129 tls-cert=/etc/squid/squid-ca-cert.pem tls-key=/etc/squid/squid-ca-key.pem generate-host-certificates=on dynamic_cert_mem_cache_size=4MB
sslcrtd_program /lib/squid/security_file_certgen -c -s /usr/local/squid/var/cache/squid/ssl_db -M 4MB
https://stackoverflow.com/a/19671392/2394762
grep -Ev “^[[:blank:]]*(#|$)” should filter out both comments and empty lines, as is frequently useful.
https://www.server-world.info/en/note?os=Ubuntu_24.04&p=squid&f=3
htpasswd -Bc /etc/squid/.htpasswd ubuntu
https://wiki.squid-cache.org/Features/Authentication
auth_param basic program /usr/local/squid/bin/ncsa_auth /usr/local/squid/etc/passwd
squid error:transaction-end-before-headers – HIER_NONE
https://serverfault.com/questions/1059944/configuring-squid-to-not-log-tcp-connections-lots-of-errortransaction-end-bef
https://community.ipfire.org/t/lots-of-none-none-000-0-error-transaction-end-before-headers-hier-none-error-messages-in-the-squid-log/9548
https://stackoverflow.com/questions/9445489/performing-http-requests-with-curl-using-proxy
curl -x http://proxy_server:proxy_port –proxy-user username:password -L http://url
How to persist data with docker compose
https://dev.to/darkmavis1980/how-to-persist-data-with-docker-compose-ik8
Bind mounts vs Volumes
https://superuser.com/questions/203674/how-to-clear-flush-the-dns-cache-in-google-chrome
Navigate to chrome://net-internals/#dns and press the “Clear host cache” button.
chrome://net-internals/#sockets
https://stackoverflow.com/questions/32442822/how-to-update-software-inside-a-docker-container
You never update software in a running container. You pull down a new version from the hub. If we assume you’re using the latest tag (which is a bad idea, always pin your versions) of your image and it’s one of the official library images or the publicly available that uses automated builds you’ll get the latest version of the container image when you pull the image.
https://www.reddit.com/r/selfhosted/comments/18c5gmh/is_updating_software_in_docker_containers_useful/
No. If you for whatever reasons want to update those, you would use a custom Dockerfile to build your own image. You dont install/update things inside a container, thats a bad practice.
https://www.howtoforge.com/how-to-install-gitlab-with-docker-on-ubuntu-22-04/
https://shape.host/resources/how-to-install-gitlab-with-docker-on-ubuntu-22-04
How to Install GitLab with Docker on Ubuntu 22.04
Install and configure a MySQL server
https://ubuntu.com/server/docs/install-and-configure-a-mysql-server
How to Install MySQL on Ubuntu 24.04 (With setting root password)
https://docs.vultr.com/how-to-install-mysql-on-ubuntu-24-04
Mysql root auth_socket to empty password
https://stackoverflow.com/questions/61952490/mysql-root-auth-socket-to-empty-password
By default, root user in a freshly installed mysql-server is set to auth_socket which allows you to login via sudo mysql.
For me, only these steps could help me setting the root password on version 8.0.19:
https://stackoverflow.com/a/66045050/2394762
mysql
SELECT user,authentication_string FROM mysql.user;
ALTER USER ‘root’@’localhost’ IDENTIFIED WITH mysql_native_password BY ‘your_pass_here’;
FLUSH PRIVILEGES;
SELECT user,authentication_string FROM mysql.user;
https://stackoverflow.com/a/77041002/2394762
Navigate to /etc/my.cnf Add these following lines:
validate_password.policy = LOW
validate_password.length = 2
validate_password.mixed_case_count = 0
validate_password.number_count = 0
validate_password.special_char_count = 0
htpasswd replacement with openssl
https://gist.github.com/samba/789122387e7f7330890b
`openssl passwd -apr1`\n” >> ${1}
How to use sftp instead of ftp when updating wordpress plugins?
https://stackoverflow.com/questions/53203050/how-to-use-sftp-instead-of-ftp-when-updating-wordpress-plugins
If only FTP and FTPS (SSL) appear as options on WordPress when installing plugins, etc., then installing the PHP extension for SSH2 will automatically add an SSH2 option (for SFTP) to WordPress.
For example, on Ubuntu:
sudo apt install php-ssh2
And restart the web server (e.g. Nginx or Apache).
WordPress refusing FTP connection when using correct details
https://webmasters.stackexchange.com/questions/60676/wordpress-refusing-ftp-connection-when-using-correct-details
define( ‘FS_METHOD’, ‘ftpext’ );
define( ‘FTP_BASE’, ‘/path/to/wordpress/’ );
define( ‘FTP_CONTENT_DIR’, ‘/path/to/wordpress/wp-content/’ );
define( ‘FTP_PLUGIN_DIR ‘, ‘/path/to/wordpress/wp-content/plugins/’ );
define( ‘FTP_PUBKEY’, ‘/home/username/.ssh/id_rsa.pub’ );
define( ‘FTP_PRIKEY’, ‘/home/username/.ssh/id_rsa’ );
define( ‘FTP_USER’, ‘username’ );
define( ‘FTP_PASS’, ‘password’ );
define( ‘FTP_HOST’, ‘ftp.example.org’ );
define( ‘FTP_SSL’, false );
https://superuser.com/a/370030/1110176
Your personal public and private ssh keys are normally stored in:
$HOME/.ssh/id_dsa (private key)
$HOME/.ssh/id_dsa.pub (public key)
Or they could be id_rsa and id_rsa.pub if you created RSA keys rather than DSA keys (OpenSSH supports both forms).
But the fact that you’ve established ssh connections before doesn’t imply that you have ssh keys. If the ssh command can’t find your personal key, it will prompt you for a password for the remote system. This is less secure than using keys.
You should normally create your ssh private key with a passphrase. If you create it without a passphrase, someone who gets a copy of your private key can impersonate you. ssh-agent lets you use a key with a passphrase without having to re-enter your passphrase every time you use it.
How To Configure Secure Updates and Installations in WordPress on Ubuntu
https://www.digitalocean.com/community/tutorials/how-to-configure-secure-updates-and-installations-in-wordpress-on-ubuntu#create-ssh-keys-for-wordpress
define(‘FTP_PUBKEY’,’/home/wp-user/wp_rsa.pub’);
define(‘FTP_PRIKEY’,’/home/wp-user/wp_rsa’);
define(‘FTP_USER’,’wp-user’);
define(‘FTP_PASS’,”);
define(‘FTP_HOST’,’127.0.0.1:22′);
enable SFTP via SSH keys in wordpress
https://wordpress.stackexchange.com/a/250320
define( ‘FS_METHOD’, ‘ssh’ );
define( ‘FTP_BASE’, ‘/home/user/wordpress’ );
define( ‘FTP_PUBKEY’, ‘/home/user/.ssh/id_rsa.pub’ );
define( ‘FTP_PRIKEY’, ‘/home/user/.ssh/id_rsa’ );
define( ‘FTP_USER’, ‘user’ );
define( ‘FTP_HOST’, ‘localhost:22’ );
How to enable mysqlnd for php?
https://stackoverflow.com/questions/13159518/how-to-enable-mysqlnd-for-php
As the package manager complains, you can’t have both php-mysql and php-mysqlnd installed.
Can it be safe to disable binary logging in MySQL?
https://dba.stackexchange.com/questions/310081/can-it-be-safe-to-disable-binary-logging-in-mysql
Unlike many other DBMSes, MySQL has two levels of logs to perform the “redo” function. Logs used to perform crash recovery are implemented (or not) by the storage engines, e.g. the InnoDB redo and undo logs. These logs allow the storage engine to replay committed and undo uncommitted transactions when the server recovers from an abend. They may also be used to allow online backups.
The binary log is maintained by the MySQL server process itself, it does not belong to any particular storage engine. As you have mentioned, it allows, among other things, point-in-time recovery (PITR) by replaying transactions on top of a restored backup. It is not used for crash recovery.
In other words, if you do not require PITR or replication you can safely disable the binary log; recovery of the database to a consistent state after a crash will be enabled by the storage engine redo/undo logs — just make sure you use a storage engine that implements them.